 Far too often I see terrible dead lift – or deadlift if your spell checker doesn’t autocorrect it 😉 – form in the gym and online. Often you won’t see this exercise because some local gyms won’t allow it or trainees are avoiding it because a) it’s hard work or b) they don’t want to hurt themselves.
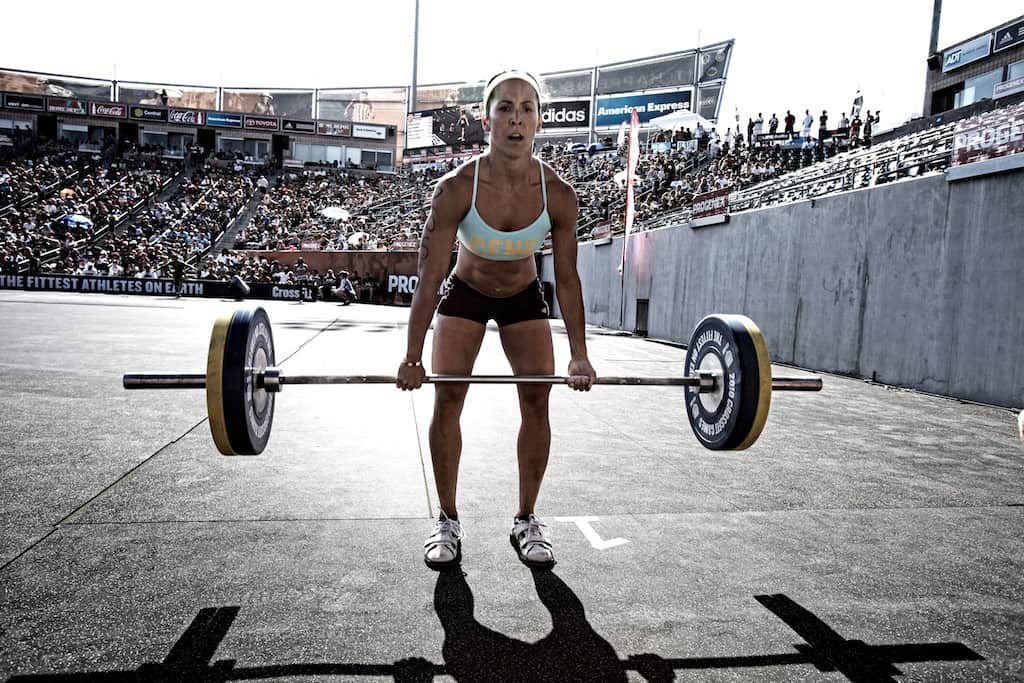
The deadlift primarily involves hip extension with knee extension to pull a barbell off the floor to an upright position. It’s simple when you think about it – “pick up this bar off the floor, stand straight, okay good.”
The deadlift can be performed with a barbell, dumbbells, kettle bells and grocery bags – but the barbell version is the most common. There are several versions of the deadlift as well – in this post, we’ll just consider the conventional version.
I hate to use this word, but the deadlift is a very functional lift that all people of all ages can benefit from. It teaches proper lifting mechanics and builds brute strength.
The deadlift is considered a grind lift and a powerlifting exercise because it is one of the three exercises performed at a power lifting meet, along with the bench press and squat.
It is also involved when performing Cleans pulled from the floor, in a phase known as the 1st Pull. Essentially, the bar is deadlifted to the transition zone (the knees) in preparation for the 2nd Pull and Scoop phases involved in a Clean.
Here are 11 tips to clean up your deadlift, so your deadlift doesn’t look like this:
11 Tips to Clean Up Your Deadlift
1. Stand with your heels 8-12″ wide with your feet slightly, and I mean slightly turned out.
The wider you stand, the wider your hands go. The wider your hands go, the lower you have to go to reach the bar. The lower you have to go to reach the bar, the longer distance you have to pull the bar. Standing 8-12″ wide gives you the best advantageous biomechanical position – this is called the “pulling stance.”
2. Place your hands just outside of your legs.
As stated above, the wider you place your hands, the lower you have to go. You want the bar to travel the shortest distance possible when you lock your hips.
3. Use a double overhand grip until you can’t deadlift the bar.
This will increase grip strength and train symmetry in your shoulders – that is, until you have to switch to a mixed grip (one overhand grip and one underhand grip). A mixed grip is commonly associated with the deadlift but most people use it for all sets, heavy or light. For all warmup sets and until you can’t deadlift the bar because your grip gives out, use a double overhand grip. Straps can be used for extremely heavy sets – but I would only recommend using straps if you can still maintain form.
4. When you walk up to the bar and you look down, the bar should be directly over your mid-foot (that means really close to the shins).
The shorted distance between two points is a straight line – with the bar too far forward, you have to pull the bar a greater distance to lock it out. Keep the bar as close to your shins as possible on the way up and down.
5. When setting your spine position, approach the bar with your hands by bending your knees forward.
By bending your knees and pushing them slightly forward, you lower your torso toward the bar. Don’t move the bar because you’ll move it away from the mid-foot position you already ensured.
6. Keep your shoulders slightly in front of the bar.
Your arms will be angled slightly behind you when you’re in the correct position. As Mark Rippetoe points out in Starting Strength, 3rd Ed., “the arms are not plumb in a deadlift because the lats do not attached to the arms at 90 degrees when the arms are plumb.” The angled position creates a more stable shoulder.
When the shoulder is in front of the bar and the back angle is stable in a pull, the angle of attachment between the lat and the humerus is about 90 degrees, since this is the angle at which the least muscular force is required to produce a rotation force that is equal and opposite to the weight.
Mark Rippetoe, Starting Strength, 3rd Ed.
This leads me to my next tip:
7. Don’t sit behind the bar to deadlift it – a deadlift is not a squat is not a deadlift.
When you sit (bend your knees too much) to deadlift, your shoulders move behind the bar and the 90 degree position at the shoulder joint is lost. You want higher hips in a deadlift compared to a squat.
8. Stick out your chest and retract your shoulder blades.
Pretend you’re at the beach and puff your chest out – pull your shoulder blades back and keep this tight position at the bottom of the deadlift. Stick out your butt and keep this extended spine. Notice the back is not rounded or in flexion as in the horrible video above. You want to maintain this position through the lift – your lower and upper back work like crazy (isometrically) to maintain this position. This is why most people feel stiffness in their lower and upper back the days following a deadlift workout. This is called good soreness or stiffness, whereas, bad stiffness would result from rounded back deadlifts.
9. Squeeze the bar off the floor.
Develop tension and full body tightness just prior to deadlifting. Once you get your stance and torso position, take a belly breath of air and crush grip the bar. Your body at this point should be tight like a brick house. Squeeze the bar off the floor as you stand. DO NOT JERK THE BAR OFF THE FLOOR. By jerking I mean, creating tension and then DROPPING before applying force to the bar. This is bad technique and can be quite dangerous.
10. Lock your hips and don’t hyperextend your spine.
Finish the deadlift with a strong hip drive forward into the bar. Stand tall and squeeze your glutes. DO NOT lean back and hyperextend your spine – this doesn’t help the form. You can injure yourself and it doesn’t benefit you at all.
11. Drop the deadlift.
Many people hurt them selves on the way down during a deadlift as well. If you use bumper plates, drop the deadlift and reset between each rep. If you don’t have bumper plates, don’t drop the bar because you’ll probably get kicked out of your gym. Slide the bar down your thighs while you stick out your butt. Once you pass the knees, bend them to put the bar down. Don’t bend your knees first when putting down the bar because the bar will sit on your thighs – you must clear the knees before bending them to put the bar down.
Wrap up:
The deadlift is amazing at building functional strength, do it right or suffer the consequences.
 If you found this post interesting, I’m sure you’ll enjoy the new ebook published by Dragon Door called Deadlift Dynamite. It’s written by the man himself Andy Bolton and Pavel (what a combo!). I’ve fingered through it and read a couple sections and it looks phenomenal. I wish I had this when I first started deadlifting (I watched an old video of me deadlifting and it’s amazing I didn’t get hurt!). To find out more, click here.
Thanks for reading,
-JK